Introduction
This
article describes how to retrieve Picasa Albums with a photo in
ASP.Net. Here I will describe how to communicate with Picasa using the
Google API.
Description
Since
it is a third party software, for this we require a third party DLL to
be referenced by our application that will communicate with the Gmail
server.
For this we must download the Google API setup from the following link:
Or you can directly download it from this link:
When you install this setup you will get these DLL files in your PC:
- Google.GData.Client.dll
- Google.GData.Photos.dll
- Google.GData.Extensions.dll
Collect these DLLs.
To view your retrieved photos in a gallery look we use the jQuery class libraries. So you must download these files and CSS:
1. jquery-1.10.1.js
2. jquery.galleriffic.js
3. jquery.opacityrollover.jsYou can also download it from the source code attached in the file.
Design
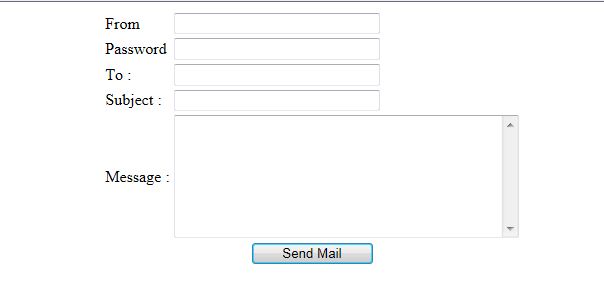
Now design your screen like the following screen.

Or you can copy the following source code:
// Comment
Next add the following JavaScript code in the head tag (it's used to design the gallery):
<head runat="server"> <title></title> <link rel="stylesheet" href="css/basic.css" type="text/css" /> <link rel="stylesheet" href="css/galleriffic-2.css" type="text/css" /> <script type="text/javascript" src="js/jquery-1.10.1.js"></script> <script type="text/javascript" src="js/jquery.galleriffic.js"></script> <script type="text/javascript" src="js/jquery.opacityrollover.js"></script> <script type="text/javascript"> document.write('');
</script> <script type="text/javascript"> jQuery(document).ready(function ($) {
// We only want these styles applied when javascript is enabled $('div.navigation').css({ 'width': '300px', 'float': 'left' });
$('div.content').css('display', 'block');
</script> <script type="text/javascript"> jQuery(document).ready(function ($) {
// We only want these styles applied when javascript is enabled $('div.navigation').css({ 'width': '300px', 'float': 'left' });
$('div.content').css('display', 'block');
// Initially set opacity on thumbs and add // additional styling for hover effect on thumbs var onMouseOutOpacity = 0.67;
$('#thumbs ul.thumbs li').opacityrollover({
mouseOutOpacity: onMouseOutOpacity,
mouseOverOpacity: 1.0,
fadeSpeed: 'fast',
exemptionSelector: '.selected' });
// Initialize Advanced Galleriffic Gallery var gallery = $('#thumbs').galleriffic({
delay: 2500,
numThumbs: 15,
preloadAhead: 10,
enableTopPager: true,
enableBottomPager: true,
maxPagesToShow: 7,
imageContainerSel: '#slideshow',
controlsContainerSel: '#controls',
captionContainerSel: '#caption',
loadingContainerSel: '#loading',
renderSSControls: true,
renderNavControls: true,
playLinkText: 'Play Slideshow',
pauseLinkText: 'Pause Slideshow',
prevLinkText: 'Previous Photo',
nextLinkText: 'Next Photo,
nextPageLinkText: 'Next ,
prevPageLinkText: 'Prev',
enableHistory: false,
autoStart: false,
syncTransitions: true,
defaultTransitionDuration: 900,
onSlideChange: function (prevIndex, nextIndex) {
// 'this' refers to the gallery, which is an extension of $('#thumbs') this.find('ul.thumbs').children()
.eq(prevIndex).fadeTo('fast', onMouseOutOpacity).end()
.eq(nextIndex).fadeTo('fast', 1.0);
},
onPageTransitionOut: function (callback) {
this.fadeTo('fast', 0.0, callback);
},
onPageTransitionIn: function () {
this.fadeTo('fast', 1.0);
}
});
});
</script></head>
Now go to the code view.
Next add a reference of the following Google gdata DLL to your website:
- Google.GData.Client.dll
- Google.GData.Extensions.dll
- Google.GData.Photos.dll
And write the following code .cs file:
using System;
using System.Web.UI.WebControls;
using Google.GData.Photos;
using System.Data;
using System.Text;
using System.Web.UI.WebControls;
using Google.GData.Photos;
using System.Data;
using System.Text;
public partial class _Default : System.Web.UI.Page{
protected void Page_Load(object sender, EventArgs e)
{
lblMsg.Text = string.Empty;
}
/// <summary> /// This method used to bind the albums to grid /// </summary> private void BindAlbum()
{
AlbumQuery query = new AlbumQuery(PicasaQuery.CreatePicasaUri(txtUserName.Text));
PicasaService service = new PicasaService("sample");
service.setUserCredentials(txtUserName.Text, txtpwd.Text);
Session["token"] = service.QueryClientLoginToken();
PicasaFeed feed = service.Query(query);
DataSet ds = new DataSet();
DataTable dt = new DataTable();
dt.Columns.Add(new DataColumn("Album", typeof(string)));
dt.Columns.Add(new DataColumn("NO of photo", typeof(string)));
dt.Columns.Add(new DataColumn("url", typeof(string)));
dt.Columns.Add(new DataColumn("id", typeof(string)));
foreach (PicasaEntry entry in feed.Entries)
{
DataRow dr1 = dt.NewRow();
AlbumAccessor ac = new AlbumAccessor(entry);
dr1["Album"] = entry.Title.Text;
dr1["NO of photo"] = ac.NumPhotos;
dr1["id"] = ac.Id;
dr1["url"] = entry.Media.Thumbnails[0].Url;
dt.Rows.Add(dr1);
}
ds.Tables.Add(dt);
ViewState["Album"] = ds;
GridView1.DataSource = ds;
GridView1.DataBind();
}
/// <summary> /// this event used to bind the photo to gallery using the albumid /// </summary>
protected void GridView1_RowCommand(object sender, GridViewCommandEventArgs e)
{
if (e.CommandName == "Download")
{
Panel1.Visible = true;
PhotoQuery query = new PhotoQuery(PicasaQuery.CreatePicasaUri(txtUserName.Text, e.CommandArgument.ToString()));
PicasaService service = new PicasaService("Picasa");
service.setUserCredentials(hfUsername.Value, hfPwd.Value);
PicasaFeed feed = service.Query(query);
StringBuilder html = new StringBuilder();
string title;
html.Append("<ul class=\"thumbs noscript\">");
foreach (PicasaEntry entry in feed.Entries)
{
if (entry.Title.Text.LastIndexOf(".") > -1)
title = entry.Title.Text.Substring(0, entry.Title.Text.LastIndexOf("."));
else title = entry.Title.Text;
{
if (e.CommandName == "Download")
{
Panel1.Visible = true;
PhotoQuery query = new PhotoQuery(PicasaQuery.CreatePicasaUri(txtUserName.Text, e.CommandArgument.ToString()));
PicasaService service = new PicasaService("Picasa");
service.setUserCredentials(hfUsername.Value, hfPwd.Value);
PicasaFeed feed = service.Query(query);
StringBuilder html = new StringBuilder();
string title;
html.Append("<ul class=\"thumbs noscript\">");
foreach (PicasaEntry entry in feed.Entries)
{
if (entry.Title.Text.LastIndexOf(".") > -1)
title = entry.Title.Text.Substring(0, entry.Title.Text.LastIndexOf("."));
else title = entry.Title.Text;
html.Append(String.Format("<li><a class=\"thumb\" name={0} href=\"{1}\" title=\"{2}\"><img src=\"{3}\" alt=\"{4}\"/></a>",
title, entry.Media.Content.Url, title, entry.Media.Thumbnails[0].Url, title));
html.Append(String.Format("<div class=\"caption\"><div class=\"image-title\">{0}</div><div class=\"image-desc\">{1}</div></div></li>",
title, entry.Summary.Text));
title, entry.Media.Content.Url, title, entry.Media.Thumbnails[0].Url, title));
html.Append(String.Format("<div class=\"caption\"><div class=\"image-title\">{0}</div><div class=\"image-desc\">{1}</div></div></li>",
title, entry.Summary.Text));
}
html.Append("</ul>");
divSlider.InnerHtml = html.ToString();
}
}
html.Append("</ul>");
divSlider.InnerHtml = html.ToString();
}
}
protected void GridView1_SelectedIndexChanging(object sender, GridViewPageEventArgs e)
{
DataSet ds = ViewState["Album"] as DataSet;
GridView1.PageIndex = e.NewPageIndex;
GridView1.DataSource = ds;
GridView1.DataBind();
}
protected void btnLogin_Click(object sender, EventArgs e)
{
if (txtUserName.Text != string.Empty && txtpwd.Text!=string.Empty)
{
hfUsername.Value = txtUserName.Text;
hfPwd.Value = txtpwd.Text;
tdlogin.Visible = false;
BindAlbum();
}
else lblMsg.Text = "Enter Your gmail id and pwd";
}
}
{
DataSet ds = ViewState["Album"] as DataSet;
GridView1.PageIndex = e.NewPageIndex;
GridView1.DataSource = ds;
GridView1.DataBind();
}
protected void btnLogin_Click(object sender, EventArgs e)
{
if (txtUserName.Text != string.Empty && txtpwd.Text!=string.Empty)
{
hfUsername.Value = txtUserName.Text;
hfPwd.Value = txtpwd.Text;
tdlogin.Visible = false;
BindAlbum();
}
else lblMsg.Text = "Enter Your gmail id and pwd";
}
}
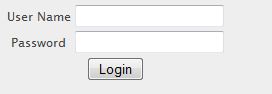
Now build your application. And enter the Gmail id and password in the corresponding TextBox.
Click on the "Login" button. It will show all your Albums with names, number of photos and album cover photo in the grid.
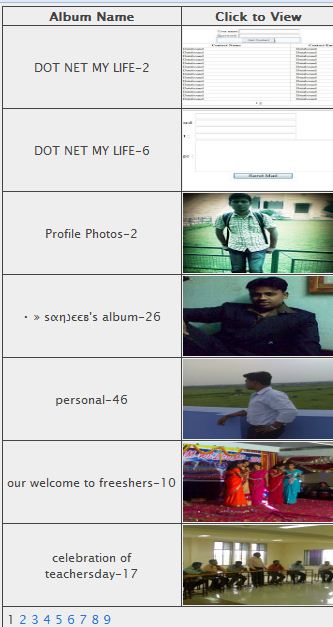
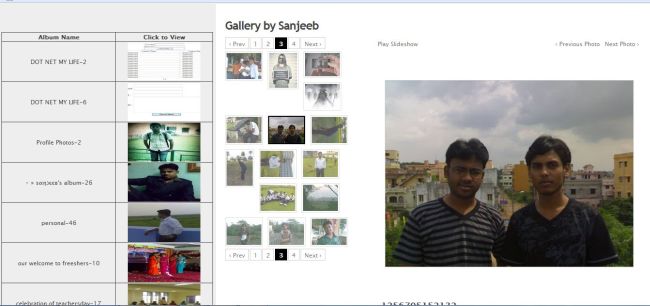
Now click on any album cover photo to see all photos. It will show all photos in the gallery. In the gallery you can also see the slide show.
To download Code Click Here