


Introduction
This article describes how to apply an animation to a GridView in ASP.Net using jQuery UI.
Description
To create this application you need the jQuery files listed below.
This article describes how to apply an animation to a GridView in ASP.Net using jQuery UI.
Description
To create this application you need the jQuery files listed below.
- jquery-1.9.1.js
- jquery-ui.js
- jquery-ui.css
Here I create three pages for checking various animations on GridView.
- Dragable GridView
- Zoom able GridView
- Animated Effect to GridView
In this example I will show how to drag a GridView to any position in a browser's screen.
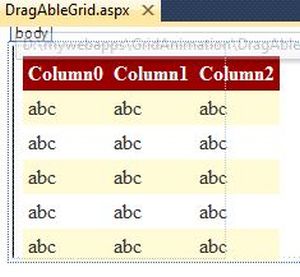
Design
Add a GridView to a page and apply any design.
Now design your screen like the following screen:
<body>
<form id="form1" runat="server">
<div id="draggable">
<asp:GridView ID="gvDetails" runat="server" CellPadding="4" ForeColor="#333333" GridLines="None">
<AlternatingRowStyle BackColor="White" />
<FooterStyle BackColor="#990000" Font-Bold="True" ForeColor="White" />
<HeaderStyle BackColor="#990000" Font-Bold="True" ForeColor="White" />
<PagerStyle BackColor="#FFCC66" ForeColor="#333333" HorizontalAlign="Center" />
<RowStyle BackColor="#FFFBD6" ForeColor="#333333" />
<SelectedRowStyle BackColor="#FFCC66" Font-Bold="True" ForeColor="Navy" />
<SortedAscendingCellStyle BackColor="#FDF5AC" />
<SortedAscendingHeaderStyle BackColor="#4D0000" />
<SortedDescendingCellStyle BackColor="#FCF6C0" />
<SortedDescendingHeaderStyle BackColor="#820000" />
</asp:GridView>
</div>
</form>
In the code above just check this div:
<div id="draggable"></div>
Within this div what element you put the dragable feature applied on that.
Next add the following JavaScript and CSS style code in the head tag of an aspx file (this is used to apply the drag feature to the div in which the grid is present).
<head runat="server">
<title></title>
<script src="Scripts/jquery-1.9.1.js" type="text/javascript"></script>
<script src="Scripts/jquery-ui.js" type="text/javascript"></script>
<style>
#draggable
{
width: 150px;
height: 150px;
padding: 0.5em;
}
</style>
<script>
$(function () {
$("#draggable").draggable();
});
</script>
</head>
Now go to the code view.
And write the following code in the .cs file for binding data to the grid:
And write the following code in the .cs file for binding data to the grid:
using System;
using System.Collections.Generic;
using System.Linq;
using System.Web;
using System.Web.UI;
using System.Web.UI.WebControls;
using System.Data;
public partial class DragAbleGrid : System.Web.UI.Page
{
protected void Page_Load(object sender, EventArgs e)
{
BindGridDetails();
}
protected void BindGridDetails()
{
DataTable dt = new DataTable();
dt.Columns.Add("EmpId", typeof(Int32));
dt.Columns.Add("EmpName", typeof(string));
dt.Columns.Add("Education", typeof(string));
dt.Columns.Add("Place", typeof(string));
DataRow dtrow = dt.NewRow();
dtrow["EmpId"] = 1;
dtrow["EmpName"] = "Sanjeeb";
dtrow["Education"] = "MCA";
dtrow["Place"] = "Hyderabad";
dt.Rows.Add(dtrow);
dtrow = dt.NewRow();
dtrow["EmpId"] = 2;
dtrow["EmpName"] = "Laku";
dtrow["Education"] = "MBA";
dtrow["Place"] = "Hyderabad";
dt.Rows.Add(dtrow);
dtrow = dt.NewRow();
dtrow["EmpId"] = 3;
dtrow["EmpName"] = "Pankaj";
dtrow["Education"] = "B.Tech";
dtrow["Place"] = "Bihar";
dt.Rows.Add(dtrow);
dtrow = dt.NewRow();
dtrow["EmpId"] = 4;
dtrow["EmpName"] = "Srikanth";
dtrow["Education"] = "B.Tech";
dtrow["Place"] = "Hyderabad";
dt.Rows.Add(dtrow);
gvDetails.DataSource = dt;
gvDetails.DataBind();
}
}
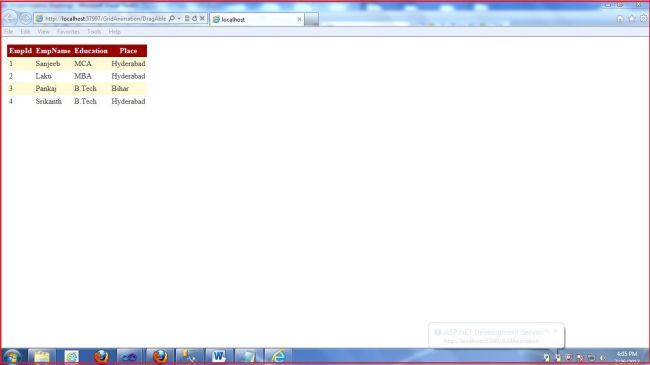
Now build your application and check.
Default view in browser:
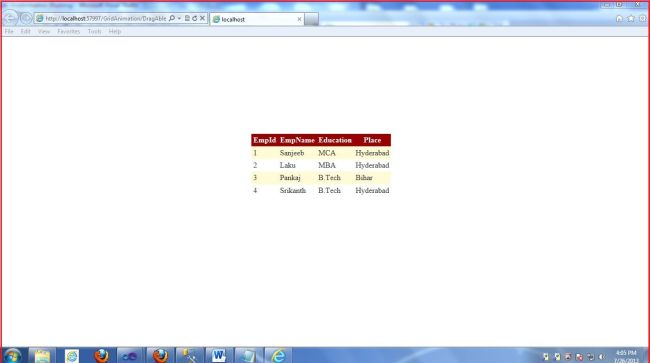
After dragging it in the browser:
Zoomable GridView In this example I will show how to Zoom a GridView on button click.
Design
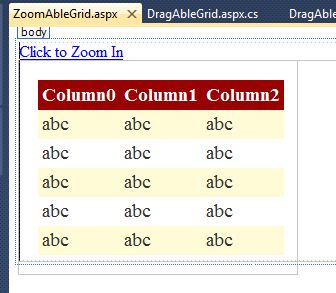
Add a GridView to a page and apply any design and one hyperlink.
Now design your screen like the following screen:
<body>
<form id="form1" runat="server">
<div>
<a href="#" id="button">Click to Zoom In</a>
</div>
<div class="toggler">
<div id="effect" class="newClass ui-corner-all">
<asp:GridView ID="gvDetails" runat="server" CellPadding="4" ForeColor="#333333" GridLines="None">
<AlternatingRowStyle BackColor="White" />
<FooterStyle BackColor="#990000" Font-Bold="True" ForeColor="White" />
<HeaderStyle BackColor="#990000" Font-Bold="True" ForeColor="White" />
<PagerStyle BackColor="#FFCC66" ForeColor="#333333" HorizontalAlign="Center" />
<RowStyle BackColor="#FFFBD6" ForeColor="#333333" />
<SelectedRowStyle BackColor="#FFCC66" Font-Bold="True" ForeColor="Navy" />
<SortedAscendingCellStyle BackColor="#FDF5AC" />
<SortedAscendingHeaderStyle BackColor="#4D0000" />
<SortedDescendingCellStyle BackColor="#FCF6C0" />
<SortedDescendingHeaderStyle BackColor="#820000" />
</asp:GridView>
</div>
</div>
</form>
In the code above just check this div:
<div class="toggler">
<div id="effect" class="newClass ui-corner-all">
</div>
</div>
Within this div what element you put the Zoom feature applied on that.
Next add the following JavaScript and CSS style code in the head tag of an aspx file (this is used to apply the Zoom feature to the div in which the grid is present).
<head runat="server">
<title></title>
<script src="Scripts/jquery-1.9.1.js" type="text/javascript"></script>
<script src="Scripts/jquery-ui.js" type="text/javascript"></script>
<style type="text/css">
.toggler
{
width: 500px;
height: 200px;
position: relative;
}
#effect
{
position: relative;
}
.newClass
{
width: 240px;
padding: 1em;
letter-spacing: 0;
font-size: 1.2em;
margin: 0;
}
.anotherNewClass
{
text-indent: 40px;
letter-spacing: .4em;
width: 410px;
height: 100px;
padding: 30px;
margin: 10px;
font-size: 1.6em;
}
</style>
<script type="text/javascript">
$(function () {
$("#button").click(function () {
$(".newClass").switchClass("newClass", "anotherNewClass", 1000);
$(".anotherNewClass").switchClass("anotherNewClass", "newClass", 1000);
return false;
});
});
</script>
</head>
Now go to the code view.
And write the following code in the .cs file for binding data to the grid:
using System;
using System.Collections.Generic;
using System.Linq;
using System.Web;
using System.Web.UI;
using System.Web.UI.WebControls;
using System.Data;
public partial class ZoomAbleGrid : System.Web.UI.Page
{
protected void Page_Load(object sender, EventArgs e)
{
BindGridDetails();
}
protected void BindGridDetails()
{
DataTable dt = new DataTable();
dt.Columns.Add("EmpId", typeof(Int32));
dt.Columns.Add("EmpName", typeof(string));
dt.Columns.Add("Education", typeof(string));
dt.Columns.Add("Place", typeof(string));
DataRow dtrow = dt.NewRow();
dtrow["EmpId"] = 1;
dtrow["EmpName"] = "Sanjeeb";
dtrow["Education"] = "MCA";
dtrow["Place"] = "Hyderabad";
dt.Rows.Add(dtrow);
dtrow = dt.NewRow();
dtrow["EmpId"] = 2;
dtrow["EmpName"] = "Laku";
dtrow["Education"] = "MBA";
dtrow["Place"] = "Hyderabad";
dt.Rows.Add(dtrow);
dtrow = dt.NewRow();
dtrow["EmpId"] = 3;
dtrow["EmpName"] = "Pankaj";
dtrow["Education"] = "B.Tech";
dtrow["Place"] = "Bihar";
dt.Rows.Add(dtrow);
dtrow = dt.NewRow();
dtrow["EmpId"] = 4;
dtrow["EmpName"] = "Srikanth";
dtrow["Education"] = "B.Tech";
dtrow["Place"] = "Hyderabad";
dt.Rows.Add(dtrow);
gvDetails.DataSource = dt;
gvDetails.DataBind();
}
}
Now build your application and check.
Default view in browser:
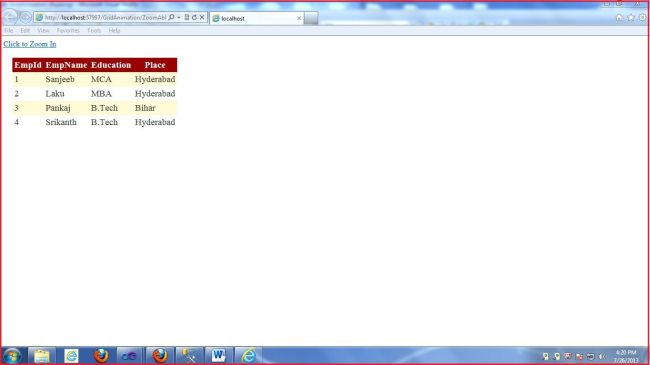
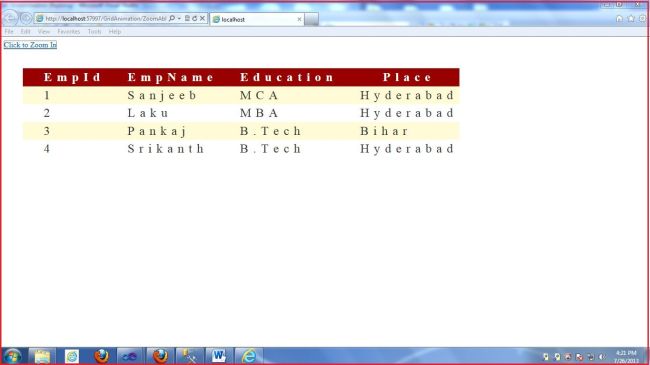
Now click on "Zoom" in Hyper link.
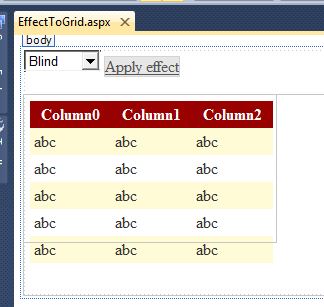
Animated Effect to GridView In this example I will show how to apply an animation effect to a GridView on a button click.
Design
Add a GridView to a page and apply any design, one dropdown and one hyperlink.
The Dropdown will show all the animation effects.
Now design your screen as in the following screen:
<body>
<form id="form1" runat="server">
<select name="effects" id="effectTypes">
<option value="blind">Blind</option>
<option value="bounce">Bounce</option>
<option value="clip">Clip</option>
<option value="drop">Drop</option>
<option value="explode">Explode</option>
<option value="fade">Fade</option>
<option value="fold">Fold</option>
<option value="highlight">Highlight</option>
<option value="puff">Puff</option>
<option value="pulsate">Pulsate</option>
<option value="scale">Scale</option>
<option value="shake">Shake</option>
<option value="size">Size</option>
<option value="slide">Slide</option>
<option value="transfer">Transfer</option>
</select>
<a href="#" id="button" class="ui-state-default ui-corner-all">Apply effect</a>
<br />
<br />
<div class="toggler">
<div id="effect" class="ui-corner-all">
<asp:GridView ID="gvDetails" runat="server" CellPadding="4" ForeColor="#333333" GridLines="None"
Height="125px" Width="243px">
<AlternatingRowStyle BackColor="White" />
<FooterStyle BackColor="#990000" Font-Bold="True" ForeColor="White" />
<HeaderStyle BackColor="#990000" Font-Bold="True" ForeColor="White" />
<PagerStyle BackColor="#FFCC66" ForeColor="#333333" HorizontalAlign="Center" />
<RowStyle BackColor="#FFFBD6" ForeColor="#333333" />
<SelectedRowStyle BackColor="#FFCC66" Font-Bold="True" ForeColor="Navy" />
<SortedAscendingCellStyle BackColor="#FDF5AC" />
<SortedAscendingHeaderStyle BackColor="#4D0000" />
<SortedDescendingCellStyle BackColor="#FCF6C0" />
<SortedDescendingHeaderStyle BackColor="#820000" />
</asp:GridView>
</div>
</div>
</form>
In the code above just check this div:
<div class="toggler">
<div id="effect" class="ui-corner-all">
</div>
</div>
Within this div what element you put the Animation effect feature applied on that.
Next add the following JavaScript and CSS style code in the head tag of an aspx file (this is used to apply an Animation effect feature to a div in which a grid is present).
<head runat="server">
<title></title>
<link href="Styles/jquery-ui.css" rel="stylesheet" type="text/css" />
<script src="Scripts/jquery-1.9.1.js" type="text/javascript"></script>
<script src="Scripts/jquery-ui.js" type="text/javascript"></script>
<style type="text/css">
.toggler
{
width: 500px;
height: 200px;
position: relative;
}
#effect
{
width: 240px;
height: 135px;
padding: 0.4em;
position: relative;
}
</style>
<script type="text/javascript">
$(function () {
// run the currently selected effect
function runEffect() {
// get effect type from
var selectedEffect = $("#effectTypes").val();
// most effect types need no options passed by default
var options = {};
// some effects have required parameters
if (selectedEffect === "scale") {
options = { percent: 0 };
} else if (selectedEffect === "transfer") {
options = { to: "#button", className: "ui-effects-transfer" };
} else if (selectedEffect === "size") {
options = { to: { width: 200, height: 60} };
}
// run the effect
$("#effect").effect(selectedEffect, options, 500, callback);
};
// callback function to bring a hidden box back
function callback() {
setTimeout(function () {
$("#effect").removeAttr("style").hide().fadeIn();
}, 1000);
};
// set effect from select menu value
$("#button").click(function () {
runEffect();
return false;
});
});
</script>
</head>
Now go to the code view.
And write the following code in the .cs file for binding data to the grid:using System;
using System.Collections.Generic;
using System.Linq;
using System.Web;
using System.Web.UI;
using System.Web.UI.WebControls;
using System.Data;
public partial class EffectToGrid : System.Web.UI.Page
{
protected void Page_Load(object sender, EventArgs e)
{
BindGridDetails();
}
protected void BindGridDetails()
{
DataTable dt = new DataTable();
dt.Columns.Add("EmpId", typeof(Int32));
dt.Columns.Add("EmpName", typeof(string));
dt.Columns.Add("Education", typeof(string));
dt.Columns.Add("Place", typeof(string));
DataRow dtrow = dt.NewRow();
dtrow["EmpId"] = 1;
dtrow["EmpName"] = "Sanjeeb";
dtrow["Education"] = "MCA";
dtrow["Place"] = "Hyderabad";
dt.Rows.Add(dtrow);
dtrow = dt.NewRow();
dtrow["EmpId"] = 2;
dtrow["EmpName"] = "Laku";
dtrow["Education"] = "MBA";
dtrow["Place"] = "Hyderabad";
dt.Rows.Add(dtrow);
dtrow = dt.NewRow();
dtrow["EmpId"] = 3;
dtrow["EmpName"] = "Pankaj";
dtrow["Education"] = "B.Tech";
dtrow["Place"] = "Bihar";
dt.Rows.Add(dtrow);
dtrow = dt.NewRow();
dtrow["EmpId"] = 4;
dtrow["EmpName"] = "Srikanth";
dtrow["Education"] = "B.Tech";
dtrow["Place"] = "Hyderabad";
dt.Rows.Add(dtrow);
gvDetails.DataSource = dt;
gvDetails.DataBind();
}
}
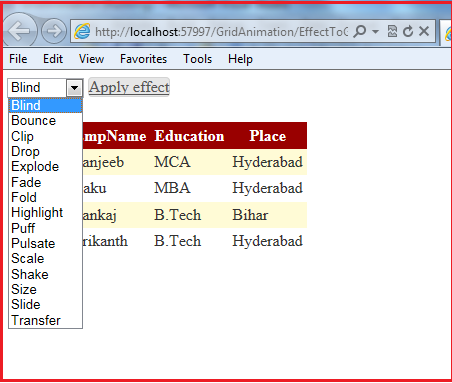
Now build your application. Select any effect from the dropdown and click on "apply effect".
If you have any modifications to suggest then please comment.
to download click here
Thank you.


0 comments:
Post a Comment